
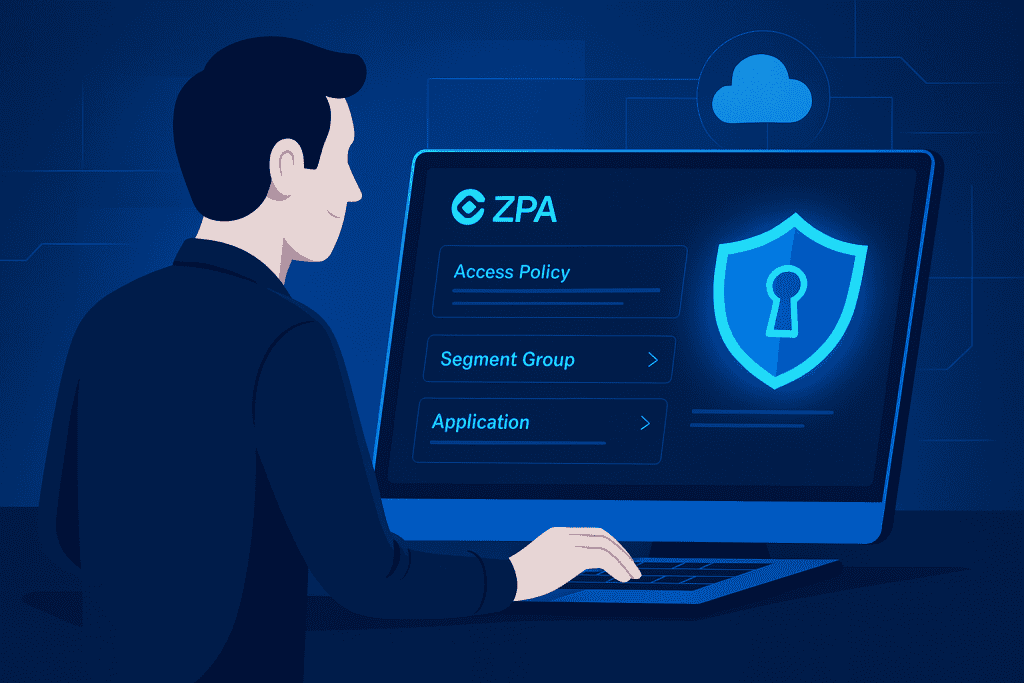
In today’s digital-first workplace, securing access to internal apps is more than a best practice—it’s a necessity. With traditional VPNs struggling to keep up with modern cyber threats, organizations are shifting toward smarter, safer alternatives. Enter Zscaler Private Access (ZPA)—a revolutionary, cloud-native solution that’s rewriting the playbook on remote application access.
ZPA doesn’t just protect—it empowers. Instead of opening up the entire network like a VPN, Zscaler Private Access only connects authorized users to specific applications based on identity and context. This makes it one of the most powerful weapons in the arsenal of any cybersecurity strategy.
Whether you’re a seasoned sysadmin or just stepping into the vast world of Zscaler, this guide walks you through how to use Zscaler Private Access from start to finish. You’ll learn what tools you need, how to deploy, what pitfalls to avoid, and how to ensure everything runs like clockwork. Grab your favorite coffee mug—we’re about to make secure access a breeze.
Zscaler Private Access (ZPA) Tools Needed
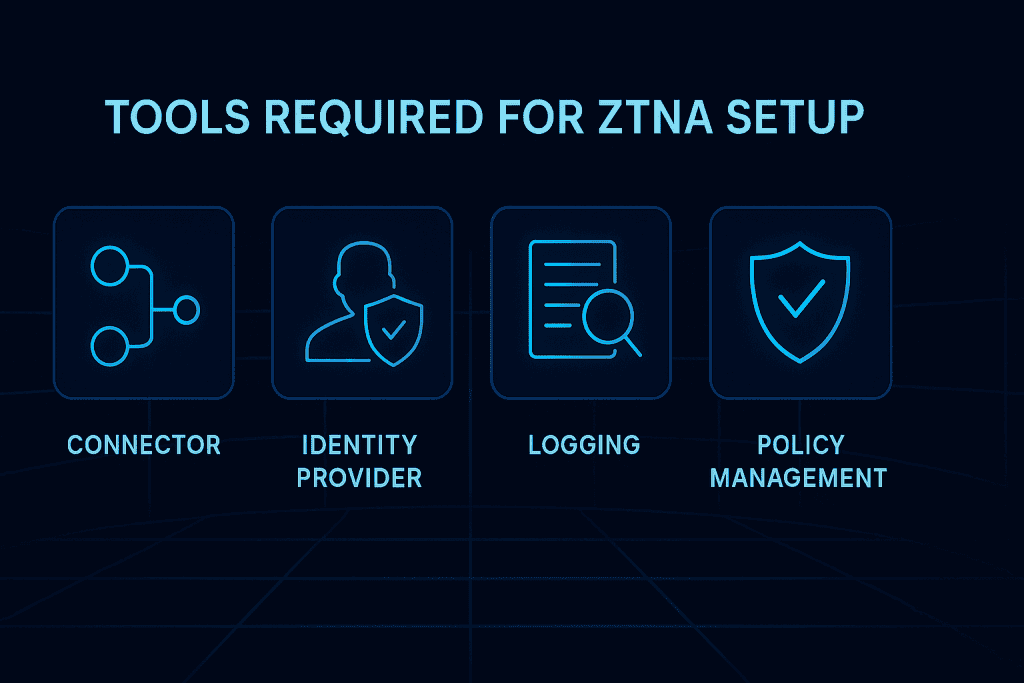
Before jumping into Zscaler Private Access configuration, gather your gear. No need for a superhero utility belt—just a few key tools, access, and knowledge.
| Tools Needed | Purpose |
|---|---|
| Zscaler Admin Portal Access | The central dashboard where you’ll set everything up. |
| ZPA Connector VM | A tiny but mighty virtual machine deployed in your network. |
| Private Application Details | Know your apps’ IP ranges, hostnames (FQDN), and ports. |
| Identity Provider (IdP) | For verifying who’s who (Azure AD, Okta, Ping Identity, etc.). |
| User Groups & Roles | You’ll create access rules based on these. |
| DNS Access | Ensure proper DNS resolution for your internal apps. |
| Monitoring Tools | Logging, auditing, and connector status checks. |
Once these pieces are in place, you’re prepped and primed to configure Zscaler Private Access.
Zscaler Private Access (ZPA) Instructions
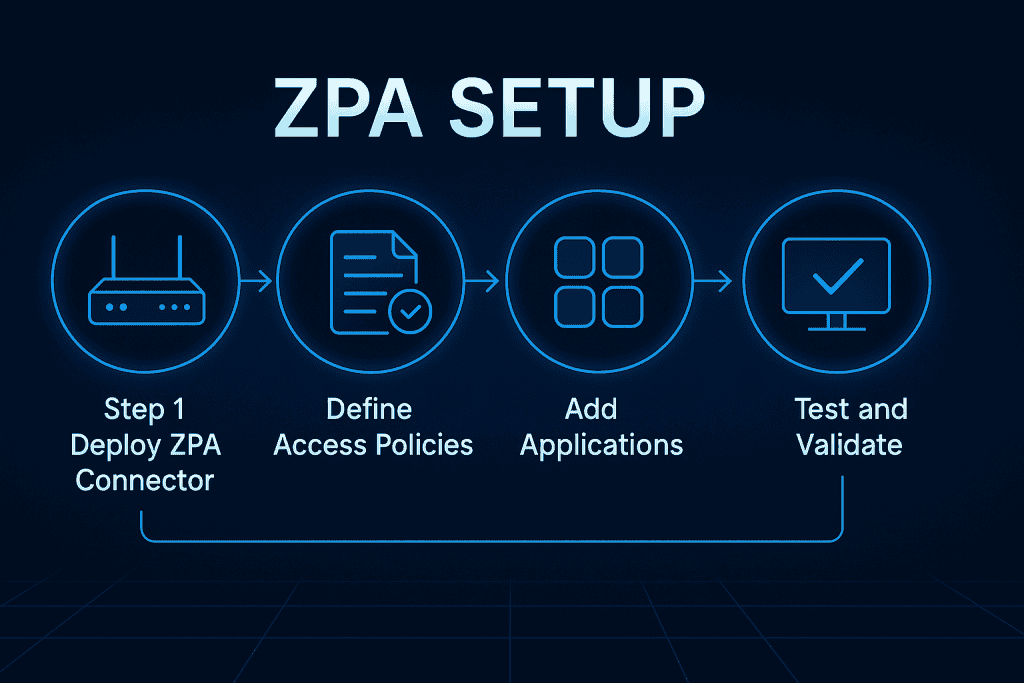
Here’s where the action begins. This step-by-step guide walks you through configuring Zscaler Private Access from the ground up—starting with logging in and ending with user testing. Follow along carefully for a smooth deployment experience.
Step 1: Access the Zscaler Admin Portal
It all starts at the portal—your mission control center. Once logged in, click on Zscaler Private Access from the navigation bar. If this is your first time, take a moment to familiarize yourself with the layout.
You’ll see tabs like Connectors, App Segments, Policies, and Access Groups. Bookmark this page—it’s going to be your new favorite URL.
Step 2: Deploy ZPA Connectors
These are the workhorses of ZPA.
ZPA Connectors are lightweight VMs you deploy in your network or cloud environments. They initiate outbound connections to the ZPA cloud, meaning no inbound firewall rules—a big win for security.
Deployment Steps:
- Assign it to a Connector Group, which logically bundles connectors for app segmentation.
- Download the connector VM from the portal (supports Hyper-V, VMware, AWS, and more).
- Spin up the VM and register it with the ZPA cloud.
Step 3: Define Application Segments
This is where zero-trust philosophy kicks in.
Create Access Policies based on:
- User identity (via your IdP)
- Device posture (are they using a trusted device?)
- Time of day or location (you can geo-fence or schedule access)
These policies are the backbone of ZPA. Each rule should be as specific as possible.PA, “Hey, here’s a door—only open it for the right people.”
Step 4: Create Access Policies
Policies in ZPA are the rulebook. Define who can access what and under which conditions. Think user groups, device posture, and time-of-day constraints. A solid policy balances security with usability. Pro tip: Test new policies in monitor mode before enforcing.
Step 5: Integrate with Your IdP
Identity is everything in a zero-trust model. Zscaler Private Access needs to confirm: “Are you really who you say you are?”
Go to Administration → Authentication Settings and integrate your IdP using SAML 2.0.
Zscaler supports:
- Azure AD
- Okta
- Google Workspace
- Ping Identity
Once configured, users are authenticated at login, and access decisions are made dynamically.
Step 6: Assign Policies to App Segments
You’ve got apps. You’ve got policies. Now connect the dots.
Navigate to Policy → Access Policy, and start assigning:
- The user group
- The application segment
- The action (allow or deny)
- Additional conditions (device trust, location, etc.)
You can also set fallback rules or default denies, which is a smart move to contain access if a condition fails.
Step 7: Validate and Test
Don’t skip this step. Test, test, test!
Use a test user account with limited access and walk through different scenarios:
- Can they access their apps?
- Are they blocked where they should be?
- What happens if they switch to an unmanaged device?
Zscaler provides logs and real-time analytics, so you can see exactly what’s happening. And if something’s off, don’t panic—ZPA’s intuitive design makes troubleshooting relatively painless.
ZPA Tips and Warnings
Here are a few nuggets of wisdom we’ve picked up along the way—and some pitfalls to steer clear of.
| Tip | Mistkaes |
|---|---|
| Use Tags– Organize connectors, apps, and users more efficiently. | Ignoring DNS Resolution– Leads to app access failures—DNS is crucial in app segment definition. |
| Test Policies in Monitor Mode– Catch misconfigurations without locking users out. | Loose Policy Configurations– Opens doors for insider threats or lateral movement. |
| Schedule Routine Reviews– Ensure apps and access rules stay updated with org changes. | Not Monitoring Connector Health– A dead connector = unhappy users and broken access. |
| Redundancy is Key– Deploy multiple connectors in different zones for high availability. | Overloading One Connector Group– Causes bottlenecks—distribute your app segments smartly. |
| Segment by Function, Not Network– Zero-trust thrives on logical segmentation, not just IP ranges. | No Logging Enabled– Misses critical audit trails and troubleshooting clues. |
Conclusion
And that’s a wrap on how to use ZPA! You’ve just walked through the practical steps to securely connect users to internal applications using one of the most robust zero-trust solutions on the market.
From deploying connectors to testing your access policies, ZPA offers a modern, secure, scalable alternative to clunky, legacy VPNs. Whether you’re defending against cyber threats or scaling your remote workforce, Zscaler Private Access empowers your team to stay productive without compromising security.
Remember, ZPA isn’t just a tool—it’s a security philosophy. So take your time, plan wisely, and always test before you deploy.
Now go forth and configure like a pro!
FAQ
How does ZPA differ from traditional VPNs in cybersecurity?
ZPA provides zero-trust access to internal apps without exposing your network, unlike VPNs that grant broad network access. It’s more secure, scalable, and cloud-native.
Can I use ZPA with any identity provider?
Yes! Zscaler Private Access integrates with major IdPs like Okta, Azure AD, and others that support SAML. Identity is central to ZPA’s policy enforcement.
What happens if a ZPA connector fails?
If a connector fails and you have no redundancy, users may lose access. Zscaler recommends deploying connector clusters for high availability.
Resources
- Zscaler Help Center. Step-by-step Configuration Guide (ZPA)
- Microsoft Learn. Zscaler Private Access Provisioning Tutorial
- Vectra AI. ZPA Integration KB
- Pulumi. ZPA Installation and Configuration
- YouTube. Zscaler Private Access Demo
- Zscaler Docs. ZPA Overview