
The first time you hear “hardware wallet,” it sounds serious. Maybe even intimidating. I still remember opening my first crypto wallet box and thinking, One wrong click and I could lose everything. That feeling is more common than most people admit.
Setting up the Trezor Safe 3 doesn’t require technical wizardry or insider knowledge. It just requires patience and a little care. In a world where crypto scams, exchange failures, and hacks dominate headlines, self-custody has become less of a niche idea and more of a necessity.

Within the broader Crypto Market, a hardware wallet gives you something rare: control. No third parties. No frozen accounts. Just you and your keys. Whether you’re holding assets long term or actively participating in the Blockchain, this guide walks you through setting up your Trezor Safe 3 calmly, clearly, and correctly.
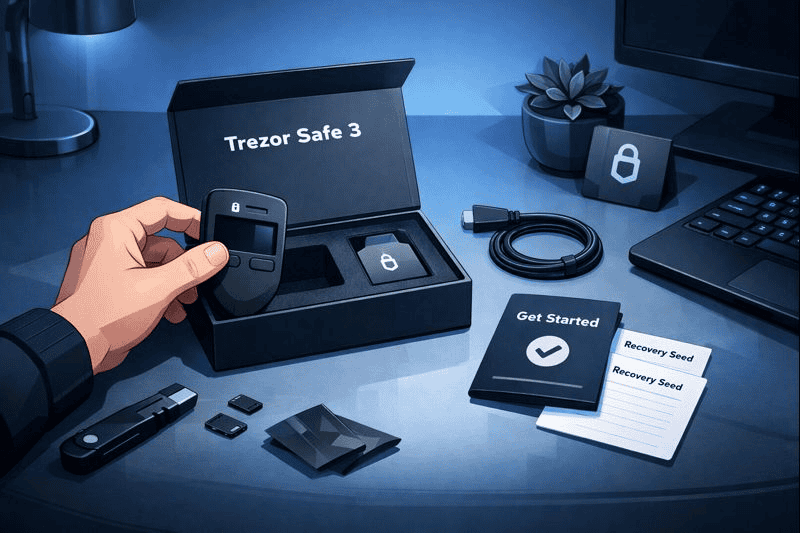
Trezor Safe 3 Materials or Tools Needed
Before starting, gather everything you need and choose a quiet space. This isn’t a process you want to rush through between meetings or while multitasking. Think of it like setting up a safe. You want full attention and zero distractions.
The Trezor Safe 3 setup is refreshingly simple, but each item plays an important role. Using trusted devices and secure surroundings reduces your exposure to unnecessary risks right from the beginning.
| Item | Purpose |
| Trezor Safe 3 device | Stores your private keys offline |
| USB cable (included) | Connects wallet to your computer |
| Computer or smartphone | Runs Trezor Suite software |
| Stable internet connection | Downloads firmware securely |
| Pen and paper | Writes recovery phrase safely |
Trezor Safe 3 Instructions
Step 1: Unbox, Inspect, and Connect
Open the box carefully and inspect the packaging. The security seal should be intact. If it looks damaged or tampered with, do not continue. This step matters more than people realize. A compromised device puts everything at risk before you even begin.
Once confirmed, connect your Trezor Safe 3 to your computer using the provided USB cable. The screen will light up, and you’ll be prompted to visit the official Trezor website. Download and install Trezor Suite, the software that lets you manage your wallet safely. This is your control center going forward.
Step 2: Install Firmware Securely
When you open Trezor Suite, it’ll detect that your Trezor Safe 3 needs firmware installed. This is expected for new devices. Follow the on-screen instructions and avoid unplugging the device during the update. Interrupting firmware installation can cause issues.
Firmware updates aren’t just about features. They patch vulnerabilities and keep your wallet aligned with ongoing changes across the Coin Market. Even seasoned users treat this step with care. It takes only a few minutes, but it’s foundational to your wallet’s long-term security.
Step 3: Create a New Wallet
After firmware installation, you’ll be asked whether to create a new wallet or recover an existing one. Choose “Create new wallet.” This generates a brand-new set of private keys inside your Trezor Safe 3, never exposed to the internet.
This is where cold storage truly begins. Unlike online wallets, your keys never leave the device. You’ll feel a shift here. It’s the moment where crypto stops being something abstract and starts feeling like real ownership. Take your time and read each prompt carefully before proceeding.
Step 4: Write Down the Recovery Phrase

This step is the most important one in the entire process. Your Trezor Safe 3 will display a recovery phrase, usually 12 or 24 words, one by one. Write them down exactly as shown, in the correct order.
Do not take screenshots. Do not store them in cloud notes. Do not email them to yourself. Paper might feel old-fashioned, but it’s still the safest option. I keep mine stored like legal documents, because that’s what it effectively is.
This phrase is the ultimate backup for your Investment. Lose it, and no company can recover your funds. Protect it like you would protect cash or jewelry.
Step 5: Confirm the Recovery Phrase
Once written down, the device will ask you to confirm the recovery phrase by selecting certain words in order. This ensures you copied everything correctly. Don’t rush. Double-check spelling and sequence.
Mistakes here are surprisingly common, especially when people are anxious to finish setup. Treat this confirmation like proofreading a legal contract. A few extra seconds now can prevent irreversible loss later.
Step 6: Set a Strong PIN
Next, you’ll create a PIN directly on the Trezor Safe 3. This protects the device if it’s lost or stolen. The PIN layout changes on the screen each time, which prevents spyware from guessing it.
Choose something secure but memorable. Avoid obvious patterns or repeating numbers. This PIN doesn’t replace your recovery phrase, but it adds an important daily layer of defense. Think of it as the lock on your front door.
Step 7: Add Accounts and Explore Trezor Suite
With setup complete, you can now add crypto accounts in Trezor Suite. You’ll see options to receive and send assets, track balances, and manage settings. This interface becomes your main interaction point with the Trezor Safe 3.
Take a few minutes to click around. Familiarity builds confidence. You don’t need to move funds immediately. Even just exploring the dashboard helps reduce mistakes later when real value is involved.
Trezor Safe 3 Tips and Warnings
Using a hardware wallet correctly is just as important as owning one. The most common mistakes aren’t technical. They’re behavioral.
First, never share your recovery phrase. No legitimate support agent, influencer, or platform will ever ask for it. If someone does, it’s a scam. Full stop.
Second, always double-check website URLs before connecting your Trezor Safe 3. Phishing sites are a persistent problem across the crypto space, especially as adoption grows. Bookmark official pages and use them consistently.
Third, consider redundancy. Store a second handwritten copy of your recovery phrase in a different secure location. Life happens. Fires, floods, and memory lapses don’t care how careful you are.
| Tip or Warning | Why It Matters |
| Never share recovery phrase | Prevents total loss of assets |
| Avoid public computers | Reduces malware exposure |
| Verify official websites | Stops phishing attacks |
| Store backups securely | Protects against accidents |
Conclusion
Setting up the Trezor Safe 3 is more than a technical checklist. It’s a commitment to taking responsibility for your digital assets. By carefully unboxing, installing firmware, securing your recovery phrase, and setting a strong PIN, you’ve built a solid foundation for long-term crypto security.
Go slow. Stay cautious. Confidence comes with repetition. Once you’ve done this once, you’ll realize that real ownership isn’t scary. It’s empowering.
FAQs
Q1: Is the Trezor Safe 3 suitable for beginners entering cryptocurrency?
Yes. The Trezor Safe 3 is designed to be beginner-friendly while still meeting high security standards. Its guided setup and clear interface make it approachable for newcomers navigating cryptocurrency for the first time.
Q2: Can I use the Trezor Safe 3 to store Bitcoin long term?
Absolutely. The Trezor Safe 3 is ideal for long-term Bitcoin storage. By keeping private keys offline, it protects holdings from online threats that commonly affect software wallets and exchanges.
Q3: How does the Trezor Safe 3 fit into today’s Crypto Market?
In today’s Crypto Market, where self-custody is increasingly emphasized, the Trezor Safe 3 offers a balance of affordability, security, and usability. It’s well-suited for users who want control without unnecessary complexity.
Resources
- Trezor. Get started with the Trezor Safe 3
- Unchained. How do I set up a Trezor Safe 3?
- Medium. Setup of the New Trezor Safe 3
- Mashable SEA. How to keep your Bitcoin safe from hackers with Trezor Safe 3
- CryptoBilis. Trezor Safe 5 vs Trezor Safe 3