
The first time I tried setting up a deep learning environment, I expected fireworks. Instead, I got version mismatches, missing dependencies, and a growing suspicion that my laptop was quietly judging me. That’s exactly why a clean PyTorch Install matters. In a world shaped by Technology Trends, getting your setup right is not just a technical chore. It is the doorway to building models, testing ideas, and turning curiosity into real projects.
A proper PyTorch Install helps students, developers, researchers, and industry teams move faster with machine learning workflows. It gives you access to one of the most flexible frameworks for neural networks, computer vision, and natural language processing. For professionals, it means fewer setup headaches and more time solving real problems. For beginners, it means starting with confidence instead of confusion.
This guide walks you through the full process in a way that feels practical and approachable. No stiff instruction manual voice. No unnecessary jargon. Just a grounded, useful path to getting PyTorch running smoothly so you can focus on learning, building, and exploring what comes next.
Tools Needed
Before starting your PyTorch, gather a few essentials so the process feels smooth instead of scattered. You will need a computer running Windows, macOS, or Linux, a stable internet connection, and access to the command line or terminal. It also helps to know whether you plan to use CPU only or GPU acceleration, because that choice affects the version you install. Python should already be installed, and package managers like pip or Conda make the job much easier.
I also recommend creating a virtual environment. It sounds like a small detail, but it saves you from the classic “why did this package break everything else?” moment. If you have an NVIDIA GPU, check CUDA compatibility before installing. Think of this prep stage like laying out ingredients before cooking. It is less glamorous than the final meal, but it keeps the whole kitchen calm.
| Tool or Requirement | Why You Need It |
|---|---|
| Computer with Windows, macOS, or Linux | Supports the framework and installation process |
| Python installed | Required to run PyTorch |
| pip or Conda | Used to download and manage packages |
| Terminal or Command Prompt | Where you run install commands |
| Internet connection | Needed to fetch packages and dependencies |
| Virtual environment | Keeps your project isolated and organized |
| Optional NVIDIA GPU | Enables faster model training with CUDA |
PyTorch Install Instructions
Step 1: Check your system and Python version
Before doing anything else, confirm your operating system and Python version. Open your terminal and run commands to see whether Python is installed and up to date. This simple check can save you from the kind of small mismatch that causes big frustration later. During my first PyTorch Install, I skipped this step because I was impatient, and I lost an hour chasing an error that boiled down to using the wrong interpreter. Make sure your machine is ready before moving on.
Step 2: Create a virtual environment
A virtual environment gives your project its own clean workspace. That means your PyTorch Install will not interfere with other Python tools already living on your computer. Use venv or Conda to create one, then activate it before installing anything. It may feel optional when you are eager to jump in, but it is one of those habits that pays off every time. A tidy environment makes troubleshooting easier and keeps future upgrades far less messy.
Step 3: Decide between CPU and GPU support
Now choose whether your PyTorch Install should use CPU only or GPU acceleration. If you are just learning or testing code, CPU is perfectly fine. If you plan to train larger models and you have a compatible NVIDIA GPU, GPU support can dramatically speed things up. This is where people often rush and click the wrong option. Slow down and verify your hardware. Picking the correct build now prevents confusing performance issues later.
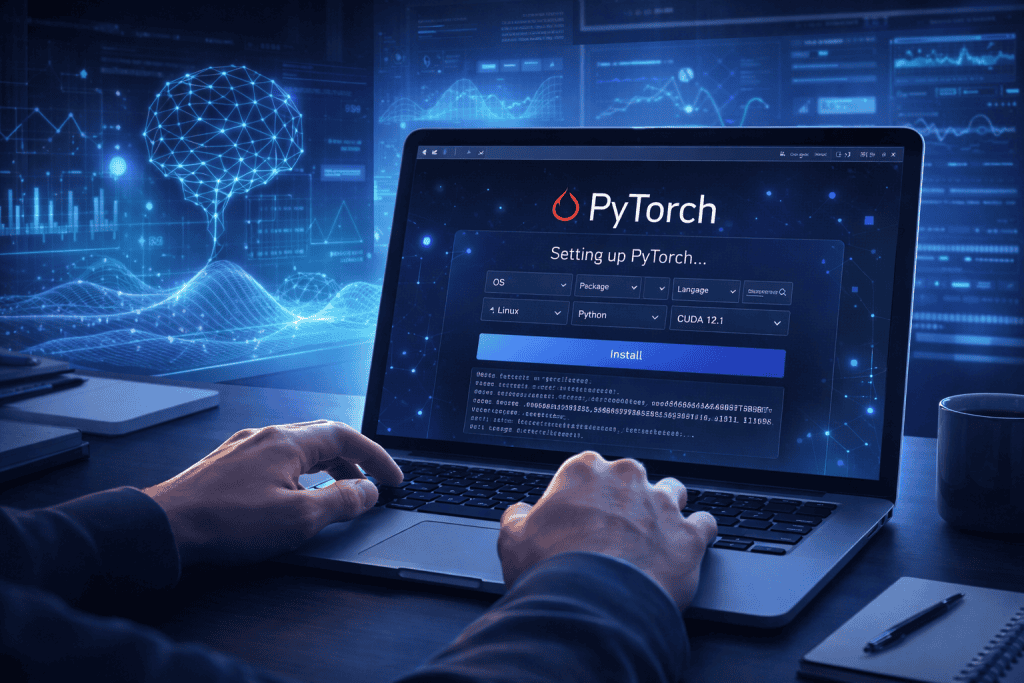
Step 4: Use the official install command
Head to the official PyTorch installation selector and choose your operating system, package manager, Python version, and compute platform. Then copy the generated command into your terminal. This is the heart of the PyTorch Install process. It is the moment where preparation turns into action. Watch the package download and install. Depending on your internet connection, it may take a little time, but once it finishes, you are already most of the way there.
Step 5: Install related libraries if needed
Many users want torchvision or torchaudio alongside PyTorch, especially for image or audio projects. Adding these during your PyTorch Install setup makes life easier later because your environment is ready for more than one type of experiment. Think ahead about the work you want to do. If you plan to handle datasets, images, or sound files, it is smart to install those companion libraries now rather than stopping mid-project to patch things together.
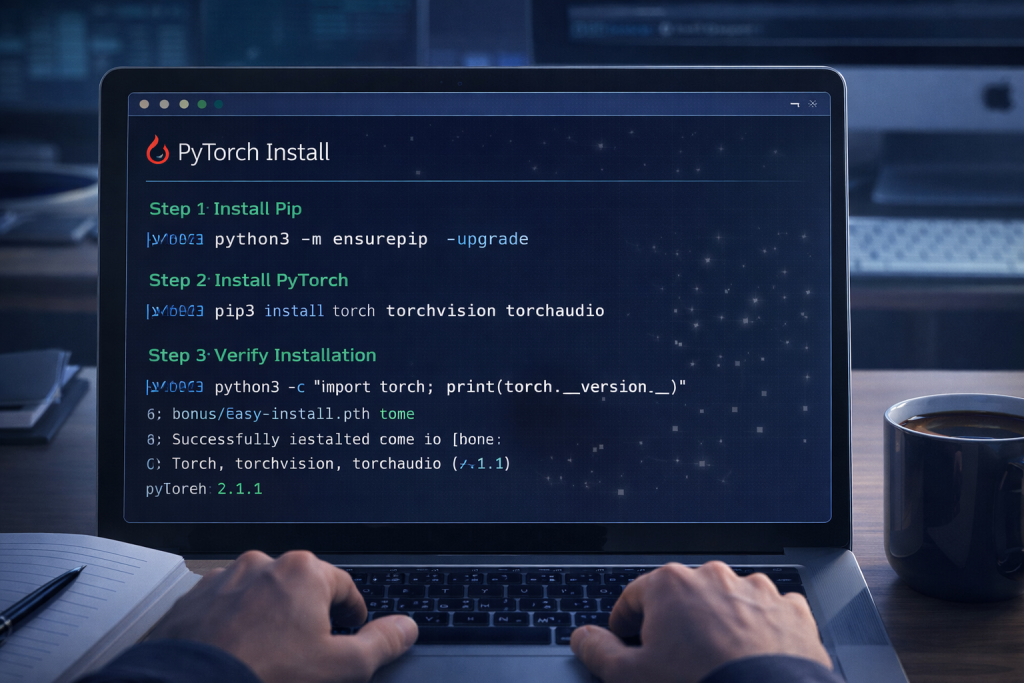
Step 6: Verify the installation
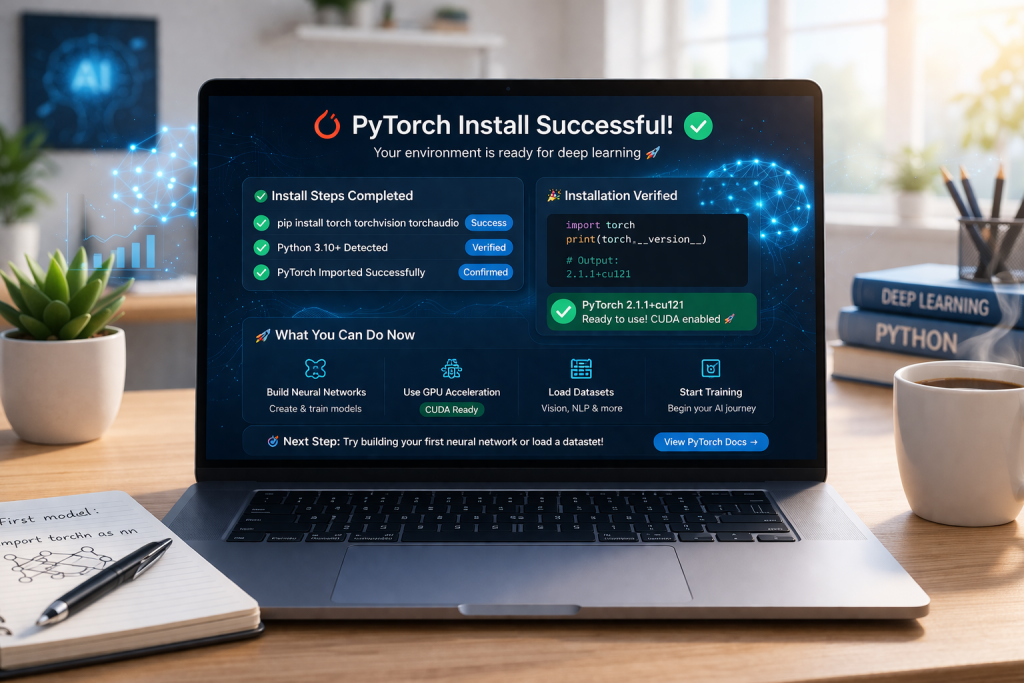
Once the packages are installed, test them with a short Python command. Import torch and print the version number. If that works, your PyTorch Install is alive and well. If you installed GPU support, also check whether CUDA is available. That tiny confirmation step feels oddly satisfying. It is like turning a key in a newly built engine and hearing it start on the first try. You do not need a full project yet. Just prove that the setup works.
Step 7: Run a small tensor test
To really confirm your environment, create a simple tensor and perform a quick operation like addition or multiplication. A successful result shows that your PyTorch Install is not only present but functional. This test is especially useful for beginners because it transforms the framework from an abstract package into something real. Suddenly, you are not just installing software. You are interacting with the tool that powers countless machine learning experiments.
Step 8: Save your setup details
The final step is one people often ignore. Write down your Python version, package manager, CUDA choice, and installed torch version. After a successful PyTorch Install, this record becomes a lifesaver when recreating the environment or helping a teammate match your setup. In fast-moving fields shaped by Technology Trends, even small version differences can matter. A quick note today can spare you a long debugging session tomorrow.
PyTorch Install Tips and Warnings
A successful PyTorch Install is often less about the install command itself and more about the choices you make around it. First, always install PyTorch inside a virtual environment. It keeps your workspace clean and reduces conflicts with unrelated Python packages. Second, match your install to your actual hardware. People often assume GPU support is automatically better, but if your machine does not support the required CUDA version, that choice can create more trouble than value.
Another smart habit is checking the package source before you copy any command. The official selector is usually the safest route because it adjusts to your platform and avoids outdated instructions floating around on forums. I have seen people follow a random tutorial from years ago and wonder why nothing works. It is not a talent issue. It is just stale information.
You should also be careful with existing environments. If you already have TensorFlow, Jupyter, or older deep learning libraries installed globally, mixing everything together can make errors harder to untangle. Keep each project contained. That is not flashy advice, but it is reliable.
When working in fields driven by futuristic technology, clean setup habits are often the difference between momentum and burnout. The same goes for teams experimenting with advanced technology, where version discipline matters more than people expect. As new inventions continue reshaping AI workflows, careful environment management supports real Innovation instead of unnecessary chaos. Even edge projects involving iot devices benefit from stable frameworks and predictable dependencies.
| Tip or Warning | Why It Matters |
|---|---|
| Use a virtual environment | Prevents package conflicts |
| Choose CPU or GPU carefully | Wrong selection can cause failed installs |
| Verify CUDA compatibility | Essential for GPU acceleration |
| Use official installation tools | Reduces risk of outdated commands |
| Test with a simple import | Confirms PyTorch is working |
| Keep setup notes | Helps recreate the environment later |
| Avoid global package clutter | Makes debugging easier |
| Update pip or Conda first | Prevents common install issues |
One more warning: do not panic if the install looks intimidating at first. Most setup problems come from small mismatches, not major disasters. Take it one step at a time, and you will almost always find the issue.
Conclusion
Getting through a PyTorch Install does not have to feel like decoding a secret language. The process becomes much easier when you break it into practical steps: check your system, create a virtual environment, choose CPU or GPU support, run the official install command, verify everything, and test it with a small tensor operation. That is the full path, and once you walk through it, the mystery fades fast.
In the bigger conversation around Technology Trends, setting up the right tools is how ideas begin to move. A good environment gives you space to learn, experiment, and build without wrestling your computer every five minutes. Whether you are a student exploring neural networks or a professional preparing for production work, this is a strong place to start.
Try the process yourself, keep your setup notes handy, and do not be afraid of a few bumps along the way. Every builder starts somewhere, and this is a very solid first step.
FAQ
What is the easiest way to complete a PyTorch Install for beginners in Technology Trends?
The easiest way to handle a PyTorch Install is to start with a virtual environment and use the official install selector. That tool helps beginners choose the correct command based on operating system, Python version, package manager, and hardware support. In the context of Technology Trends, this matters because machine learning tools evolve quickly, and the official source is more reliable than old blog posts or random forum threads. Beginners should usually start with a CPU version unless they already know their NVIDIA GPU and CUDA setup are compatible.
How do I know if my PyTorch Install should use CPU or CUDA for modern Technology Trends projects?
Your PyTorch Install should use CPU if you are learning basic workflows, testing scripts, or working on smaller experiments. You should consider CUDA only if your machine has a supported NVIDIA GPU and you want faster training performance. In many Technology Trends projects, GPU acceleration is helpful for computer vision, deep learning, and larger model workloads. The key is not to assume more power always means a better setup. A stable CPU installation is often better than a broken CUDA configuration.
Why does my PyTorch Install fail even when I follow a tutorial in Technology Trends articles?
A PyTorch Install usually fails because of version mismatches, outdated commands, missing virtual environments, or incorrect CUDA selections. Many tutorials stay online long after package recommendations have changed, which is a common problem in fast-moving Technology Trends content. Another frequent issue is using the wrong Python interpreter, especially on systems with multiple Python versions installed. The best fix is to confirm your Python version, update pip or Conda, use the official PyTorch selector, and test the install in a fresh environment.
Resources
- Coursera. What is PyTorch
- GeeksforGeeks. Getting Started with PyTorch
- IBM. PyTorch Topic Overview
- NVIDIA. PyTorch Glossary
- TechTarget. PyTorch Definition