
Setting up the Nvidia Jetson Nano is a gateway into the exciting world of AI, robotics, and advanced technology. For technology enthusiasts, students, and industry professionals, this compact yet powerful device offers a unique platform for experimenting with cutting-edge innovations. This article provides a comprehensive guide to setting up the Jetson Nano, sharing not only detailed instructions but also practical insights, useful tips, and common pitfalls to avoid.
From the necessary tools to the final test run, every section has been designed to help readers navigate their first Nvidia Jetson Nano project confidently and efficiently.
Nvidia Jetson Nano Tools Needed
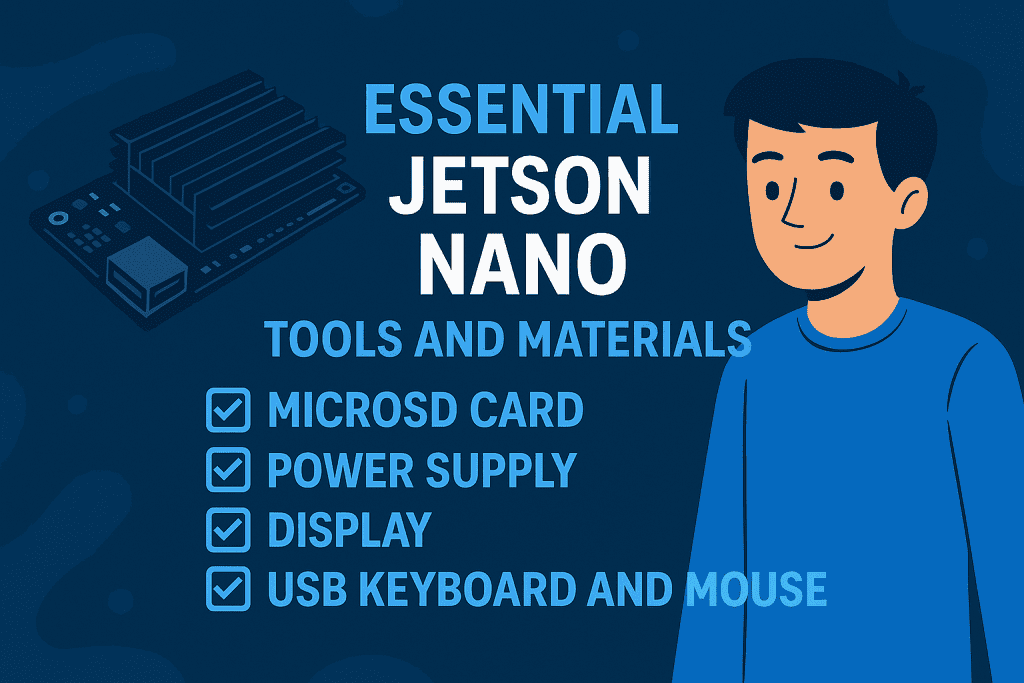
Before embarking on the setup process, it is essential to gather all the required materials and tools. This section introduces the key components and explains why each one plays a crucial role in ensuring a smooth setup.
| Item | Purpose and Importance |
|---|---|
| Nvidia Jetson Nano board | The core device, essential for running AI projects. |
| MicroSD card (32GB or higher, UHS-1) | Serves as the primary storage for the operating system and project files. |
| Micro-USB power supply or 5V/4A barrel jack | Provides stable and sufficient power to the board. |
| Keyboard and mouse | Necessary for interacting with the setup interface. |
| HDMI monitor or display | Displays the interface and outputs during setup. |
| Ethernet cable or WiFi adapter | Enables internet connectivity for updates and downloads. |
| Heatsink or fan (optional) | Helps prevent overheating during intensive tasks. |
By ensuring all these materials are at hand, users set themselves up for a hassle-free installation process.
Nvidia Jetson Nano Instructions
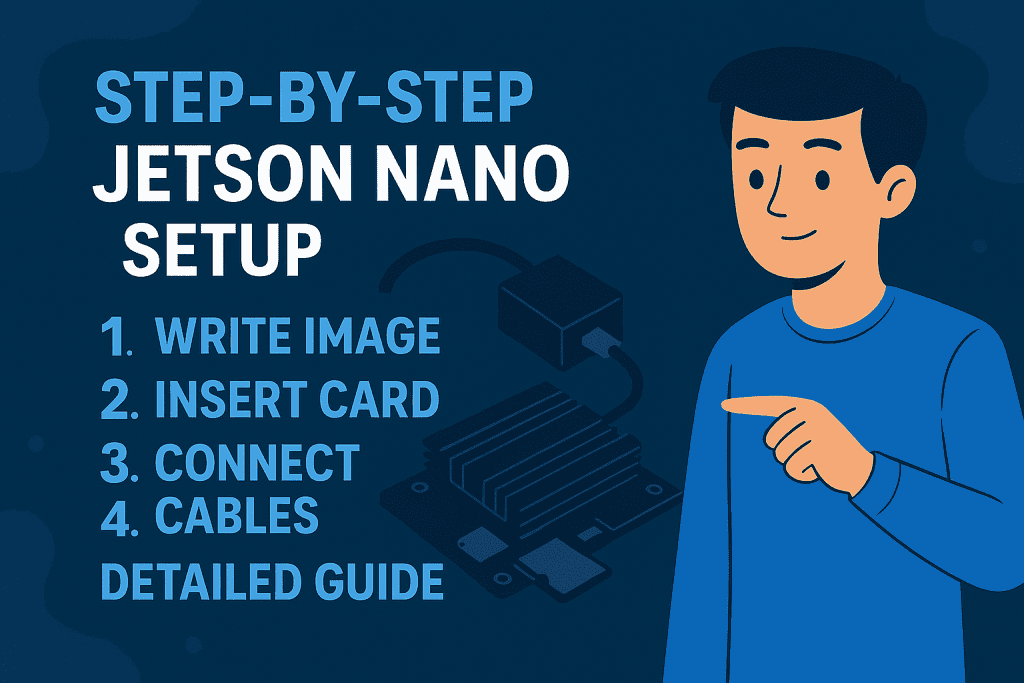
This section provides a clear roadmap for setting up the Nvidia Jetson Nano. Each step is detailed to ensure readers understand both the “how” and the “why” behind every action.
Step 1: Prepare the MicroSD Card
Preparing the MicroSD card is the foundation of the Jetson Nano setup. Without a properly flashed operating system, the board cannot function.
- Download the latest JetPack image from Nvidia’s official website.
- Use flashing software such as Etcher to write the image to the MicroSD card.
- Once the flashing process is complete, insert the card into the Jetson Nano’s MicroSD slot.
This step may take some time, but it is critical to ensure the card is prepared correctly to avoid future software glitches.
Step 2: Set Up the Hardware
After the MicroSD is ready, it is time to connect the necessary peripherals and power sources.
- Connect the keyboard and mouse to the Jetson Nano’s USB ports.
- Attach an HDMI monitor to the HDMI output port.
- Connect the Ethernet cable or plug in the WiFi adapter for internet access.
- Finally, connect the appropriate power supply to turn on the board.
At this stage, users will see the device boot up, leading to the initial configuration interface.
Step 3: Complete Initial Configuration
The Jetson Nano setup wizard guides users through key system settings.
- Select the appropriate language and region.
- Set up a username and password for system access.
- Configure WiFi (if not using Ethernet).
- Allow the system to check for and install any available updates.
Completing these tasks ensures the device is secure, personalized, and fully updated to support various project requirements.
Step 4: Install Necessary Dependencies
This step focuses on installing essential software libraries and tools to support specific projects.
- Open the Terminal and run:
sudo apt update && sudo apt upgrade. - Install programming environments such as Python.
- Depending on the project, additional libraries like OpenCV or TensorFlow may be required.
Installing dependencies early on saves time and prevents compatibility issues when developing advanced projects.
Step 5: Run a Sample Project
To verify that everything has been set up correctly, it is advisable to run one of Nvidia’s sample projects.
- Navigate to the sample folder provided in the JetPack installation.
- Launch an AI demo, such as image classification or object detection.
- Observe the real-time performance to ensure the system is functioning as expected.
This step not only validates the setup but also offers an exciting glimpse into the innovation potential of the Jetson Nano.
Nvidia Jetson Nano Tips and Warnings
After the setup, applying best practices and avoiding common mistakes ensures long-term success. This combined table provides a clear overview of practical tips alongside common warnings.
| Tips | Warnings |
|---|---|
| Use a heatsink or fan to manage system heat. | Avoid using low-quality or slow MicroSD cards to prevent lag. |
| Regularly update the OS and libraries. | Do not ignore power requirements; underpowering can cause instability. |
| Back up the MicroSD card to avoid data loss. | Skipping updates may lead to compatibility issues. |
| Check forums and community resources for advice. | Relying solely on outdated documentation can misguide your setup. |
| Test small projects before scaling up. | Jumping into complex projects without testing can overwhelm the system. |
By following these combined insights, users can achieve a smooth and optimized experience with their Nvidia Jetson Nano.
Conclusion
Setting up the Nvidia Jetson Nano transforms a compact board into a powerful tool for AI exploration. From preparing the MicroSD card and configuring the system to installing dependencies and running test projects, each step opens doors to new possibilities. Applying combined tips and avoiding common warnings ensures the board stays efficient and ready for exciting challenges.
With this guide, readers are well-equipped to take their first confident steps into the world of AI and machine learning, making the most of the Jetson Nano’s remarkable capabilities.
FAQ
What are the most common applications for the Nvidia Jetson Nano?
The Nvidia Jetson Nano is ideal for computer vision, robotics, edge AI, and deep learning tasks, thanks to its GPU acceleration and compact design.
Does the Nvidia Jetson Nano require an internet connection for all projects?
An internet connection is essential for initial setup, updates, and downloading libraries, but many AI and robotics projects can later run offline.
How does the Nvidia Jetson Nano differ from the Raspberry Pi?
While both are popular among hobbyists, the Nvidia Jetson Nano offers significantly greater GPU capabilities, making it superior for AI and machine learning workloads compared to the Raspberry Pi.
Resources
- YouTube. How to Set Up Nvidia Jetson Nano
- Medium. What I Learned Setting Up Jetson Nano
- Digi-Key. Getting Started with Nvidia Jetson Nano
- Automatic Addison. How to Set Up the Nvidia Jetson Nano Developer Kit
- X. Nvidia Jetson Nano Setup Insights