
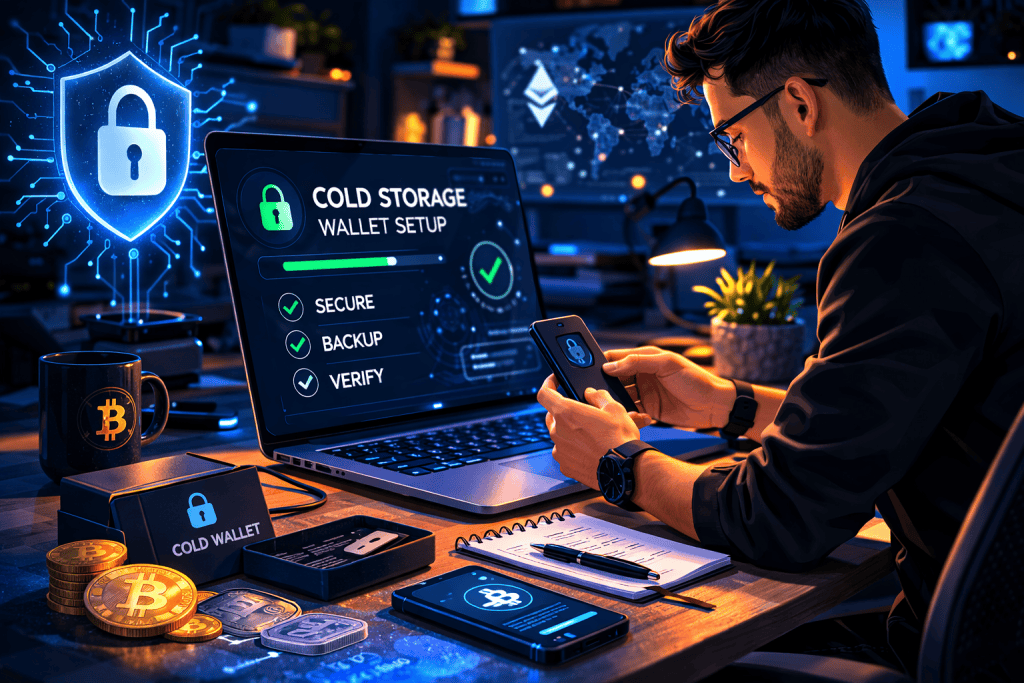
Getting started with crypto can feel exciting right up until the moment you realize one hard truth: if your assets are online all the time, they are also exposed all the time. That is where a Cold Storage Wallet comes in. In the world of Cryptocurrency, setting one up is one of the smartest moves you can make if you care about long-term protection, privacy, and peace of mind.
Think of it like moving your valuables out of a backpack you carry everywhere and into a locked safe at home. Years ago, many new holders treated digital assets casually, leaving everything on an exchange because it felt convenient. Then came the stories of hacked accounts, frozen platforms, and forgotten passwords. That was enough to convince many people to take security seriously.
A Cold Storage Wallet keeps your private keys offline, away from most of the everyday risks that come with internet-connected apps and browser tools. For beginners, it offers control. For professionals, it offers discipline. For anyone building a serious position in digital assets, it adds a layer of security that is hard to ignore.
Tools Needed
Before you begin, gather everything in one place so the setup feels calm instead of rushed. Setting up a Cold Storage Wallet does not require a room full of expensive gear, but it does demand attention and a clean process. You will need a trusted hardware wallet from a reputable brand, a computer with a secure internet connection for the initial setup, the manufacturer’s official app, and a pen or permanent marker to record your recovery phrase by hand. Some people also use a metal backup plate for better durability.
It helps to work in a quiet space with no distractions. Turn off screen sharing, avoid public Wi-Fi, and never store your recovery phrase in cloud notes or screenshots. This is also a good time to think beyond the hype of the Crypto Market and focus on security as the foundation of any serious digital asset habit.
| Item | Why You Need It |
|---|---|
| Hardware wallet | Stores private keys offline |
| Computer or laptop | Used for setup and firmware updates |
| Official wallet software | Helps initialize and manage the device |
| Pen and paper | For writing your recovery phrase safely |
| Secure private space | Reduces the risk of mistakes or exposure |
| Optional metal backup | Protects recovery phrase from fire or water |
Cold Storage Wallet Instructions
Step 1: Buy your device from a trusted source
The first step in setting up a Cold Storage Wallet is choosing a reputable hardware wallet and buying it directly from the manufacturer or an authorized seller. Avoid secondhand marketplaces, even if the discount looks tempting. A tampered device can quietly ruin your security before you even start. Check the packaging, confirm seals are intact, and look for official setup instructions from the brand. This is one area where saving a little money is not worth the risk.
Step 2: Prepare a clean and private setup environment
Before you plug anything in, create a safe setup space for your Cold Storage Wallet. Use a personal computer that is updated and free from obvious malware issues. Close unnecessary tabs, disconnect from anything public, and silence distractions. This step sounds simple, but it matters. One rushed moment can lead to a typo, a lost recovery phrase, or a screenshot you later regret. Treat the setup like opening a safe, not like downloading another app.
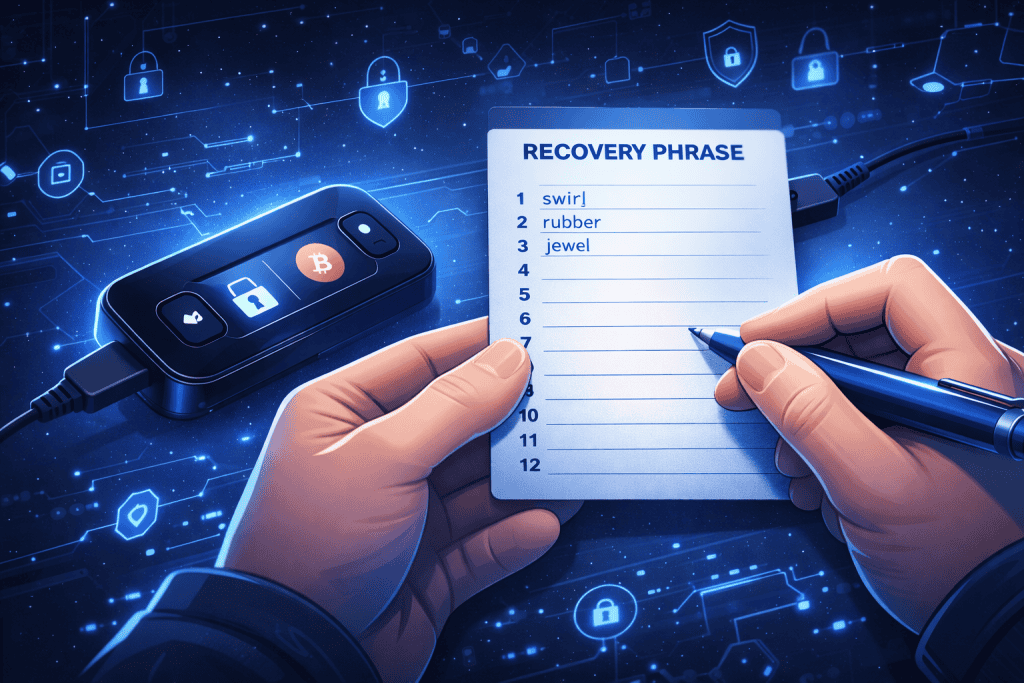
Step 3: Initialize the wallet and create a new recovery phrase
When you power on your Cold Storage Wallet, you will usually choose to create a new wallet instead of restoring an old one. The device will then generate a recovery phrase, often 12 or 24 words. Write every word down by hand in the exact order shown. Double-check spelling. Read it twice. Then read it again. This phrase is the master key to your funds. If someone gets it, they can access everything. If you lose it, you may lose access permanently.
Step 4: Confirm the phrase and set strong device protection
Most brands will ask you to confirm the recovery words to make sure you copied them correctly. This step is not busywork. It is the point where many people catch mistakes before it is too late. Once that is done, set a strong PIN for your Cold Storage Wallet. Keep it memorable but hard to guess. Do not use birthdays, repeated digits, or simple patterns. The goal is to protect the device itself while the recovery phrase remains protected somewhere separate and offline.
Step 5: Install official software and update the firmware
Next, install the manufacturer’s official app and connect your Cold Storage Wallet to complete setup. This software helps you verify the device, update firmware, and create wallet accounts for the assets you plan to hold. Always download from the official website, not ads, forums, or random links. Firmware updates may feel annoying, but they often include important security fixes. Think of them as reinforcing the locks on your digital vault before you place anything valuable inside.
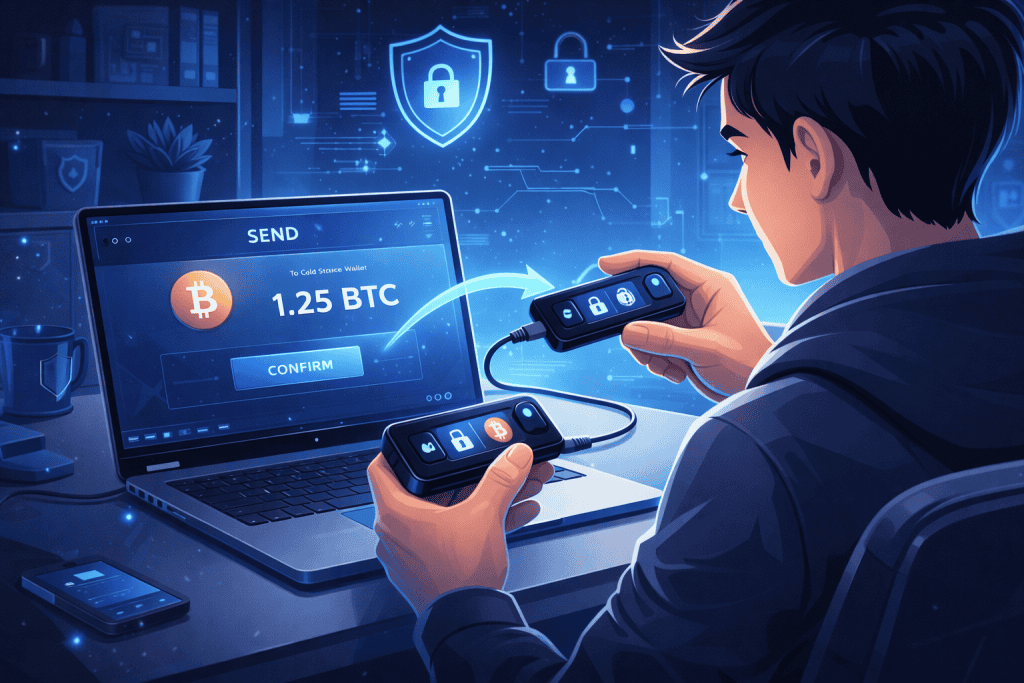
Step 6: Transfer a small test amount first
Now it is time to use your Cold Storage Wallet in real life. Open the app, generate a receiving address, and compare it carefully on both the computer and the device screen. Then send a small test amount before moving larger holdings. This habit may seem overly cautious, but it is one of the easiest ways to avoid painful errors. A tiny test transaction can confirm that everything works properly before you send the rest of your funds.
Step 7: Store backups securely and make a long-term routine
The final step is building a storage habit around your Cold Storage Wallet. Put the written recovery phrase somewhere private, dry, and secure. Many users keep one backup in a home safe and another in a separate secure location. Never save it in email drafts, phone photos, or cloud drives. Real security is not just the device. It is the routine around it. In a fast-moving Coin Market, discipline usually protects people better than excitement does.
Cold Storage Wallet Tips and Warnings
A Cold Storage Wallet is powerful, but it is not magic. It protects you best when paired with careful habits. The biggest mistake people make is assuming the device alone does all the work. In reality, your behavior is part of the security system. Write down the recovery phrase neatly, keep it offline, and never type it into websites or chat windows. No legitimate support agent will ask for it. Ever.
Another common mistake is skipping the test transfer. It feels slower in the moment, but it can save you from sending funds to the wrong network or address. Many experienced users learned this lesson the nervous way. There is also the issue of overconfidence. Some people buy a wallet, toss the recovery phrase into a drawer, and call it a day. Months later, they cannot remember where they put it. Security without organization becomes stress.
It also helps to separate long-term holdings from funds you actively use. For example, if you are holding Bitcoin as a long-term Investment, offline storage makes more sense than leaving everything exposed in a hot wallet or exchange account. Think of your setup as part of a larger Blockchain safety routine, not a one-time chore.
| Tip or Warning | Why It Matters |
|---|---|
| Buy only from official sources | Reduces risk of tampered devices |
| Never photograph your recovery phrase | Images can sync to cloud storage without you noticing |
| Use a test transaction first | Confirms addresses and network choices |
| Keep backups in separate secure locations | Protects against fire, theft, or simple loss |
| Do not share seed phrase with anyone | It gives full control of your assets |
| Update firmware only through official software | Helps patch known vulnerabilities |
| Avoid public Wi-Fi during setup | Reduces exposure during installation |
| Stay calm and double-check everything | Most costly mistakes happen when people rush |
Conclusion
Setting up a Cold Storage Wallet is not just another crypto task. It is a shift in mindset. You move from convenience-first habits to security-first habits, and that change can make all the difference over time. The process is simple when broken down into steps: buy from a trusted source, prepare a private setup space, create and verify your recovery phrase, secure the device with a PIN, update the software, test a small transfer, and store your backups wisely.
A Cold Storage Wallet gives you more control over your assets and less dependence on third parties. That control comes with responsibility, but it is worth it. Once you complete the setup, you will likely feel something most crypto users crave: confidence. If you have been putting this off, now is a great time to do it properly and give your digital holdings the protection they deserve.
FAQ
What is the difference between a hot wallet and a cold wallet?
A hot wallet is connected to the internet, making it convenient for transactions but vulnerable to hacking. A cold wallet, on the other hand, is stored offline, providing greater security for long-term storage.
What happens if I lose my cold wallet?
If your hardware wallet is lost or damaged, you can restore your funds using the recovery phrase. This is why backing up the recovery phrase is so important during the setup process.
Resources
- AIBC Blog. Complete Guide to Crypto Cold Storage.
- DroomDroom Blog. How to Set Up a Cold Wallet.
- Investopedia Blog. What is Cold Storage?
- Ledger Academy Blog. What is a Cold Wallet?
- Vestinda Blog. How to Set Up a Cold Storage Wallet.